Gesamtzahl der Seitenaufrufe

Posts mit dem Label card for a man werden angezeigt. Alle Posts anzeigen

Samstag, 25. März 2023

Best Wishes!

Hello and welcome to my blog!

Today I want to share with you a quick and easy birthday card for a man. It´s my second project for the March challenge at Country View Challenges "Birthday card for a man". 


For the background of my card I used a elder paper pad from Tim Holtz. I simply distressed the edges with DI ground espresso, used one of my all time favourite stencil from TCW called Mini Harlequin. I spreat pentart Deluxe paste lagoon blue and truffles randomly through it. After the paste was dry, I made some white splatters with acrylic paint and glued the panel on top of a card.

The focal point is Sir Vagabond I fuzzy cut from the 8 x8 paper pad. I gave him a coat of glaze for more interest and glued him with 3D foam pads to the background. I also glued down two circles from the same paper pad.

I took a flower diecut from LaBlanche and put it in Sir Vagabonds hand, then I stamped the birthday wishes on leftover cardstock, cut it to size and went with black ink around the edges. Then I found a place on my card and used foam tape to glue them down too.

Here is Sir Vagabond:


There are some days left to make a male birthday card for the challenge, you know, you can win a 20 £ voucher for the shop!

Thank you for your visit today and have a happy weekend!

Mittwoch, 1. März 2023

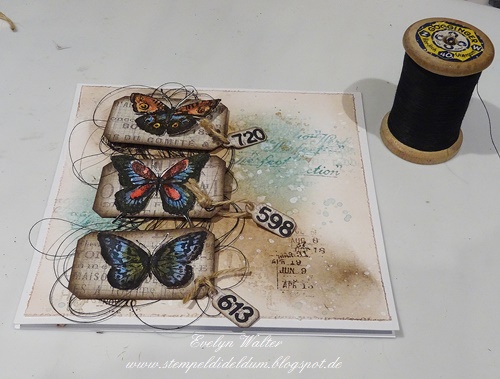
Sending Birthday Wishes!

Hello and happy March!

I can´t believe it - it´s March already, where did February go?

For the March challenge over at Country View Challenges the lovely Corrie is the host and she wants to see birthday cards for a man.

I made a little bit grungy card with a lot of new stamps and dies!


I started by colouring my background with Distress inks (walnut stain and salvage patina) with a brush, added some water drops and spritzed with a brush watered down walnut stain. Later I added some background stamping with my also new visible image stamps "Distressed Christmas" and "Background Vision" with the same Distress Inks.

I used my new purchased dies from Tim Holtz and cut out tiny tags and labels. I used some older papers from Tim Holtz.

For my focal point I used - well, also new - the butterflies from the stamp set "Watercolor CMS217" and coloured them with inktense colours and activated them with a waterbrush.

The labels were distressed with ground espresso DI and I added some eyelets. On top of the tiny tags I glued down some numbers I diecut and attached them to the labels with a string.

Underneath the labels I arranged some black thread, put some 3D tape down and glued the butterflies on top.

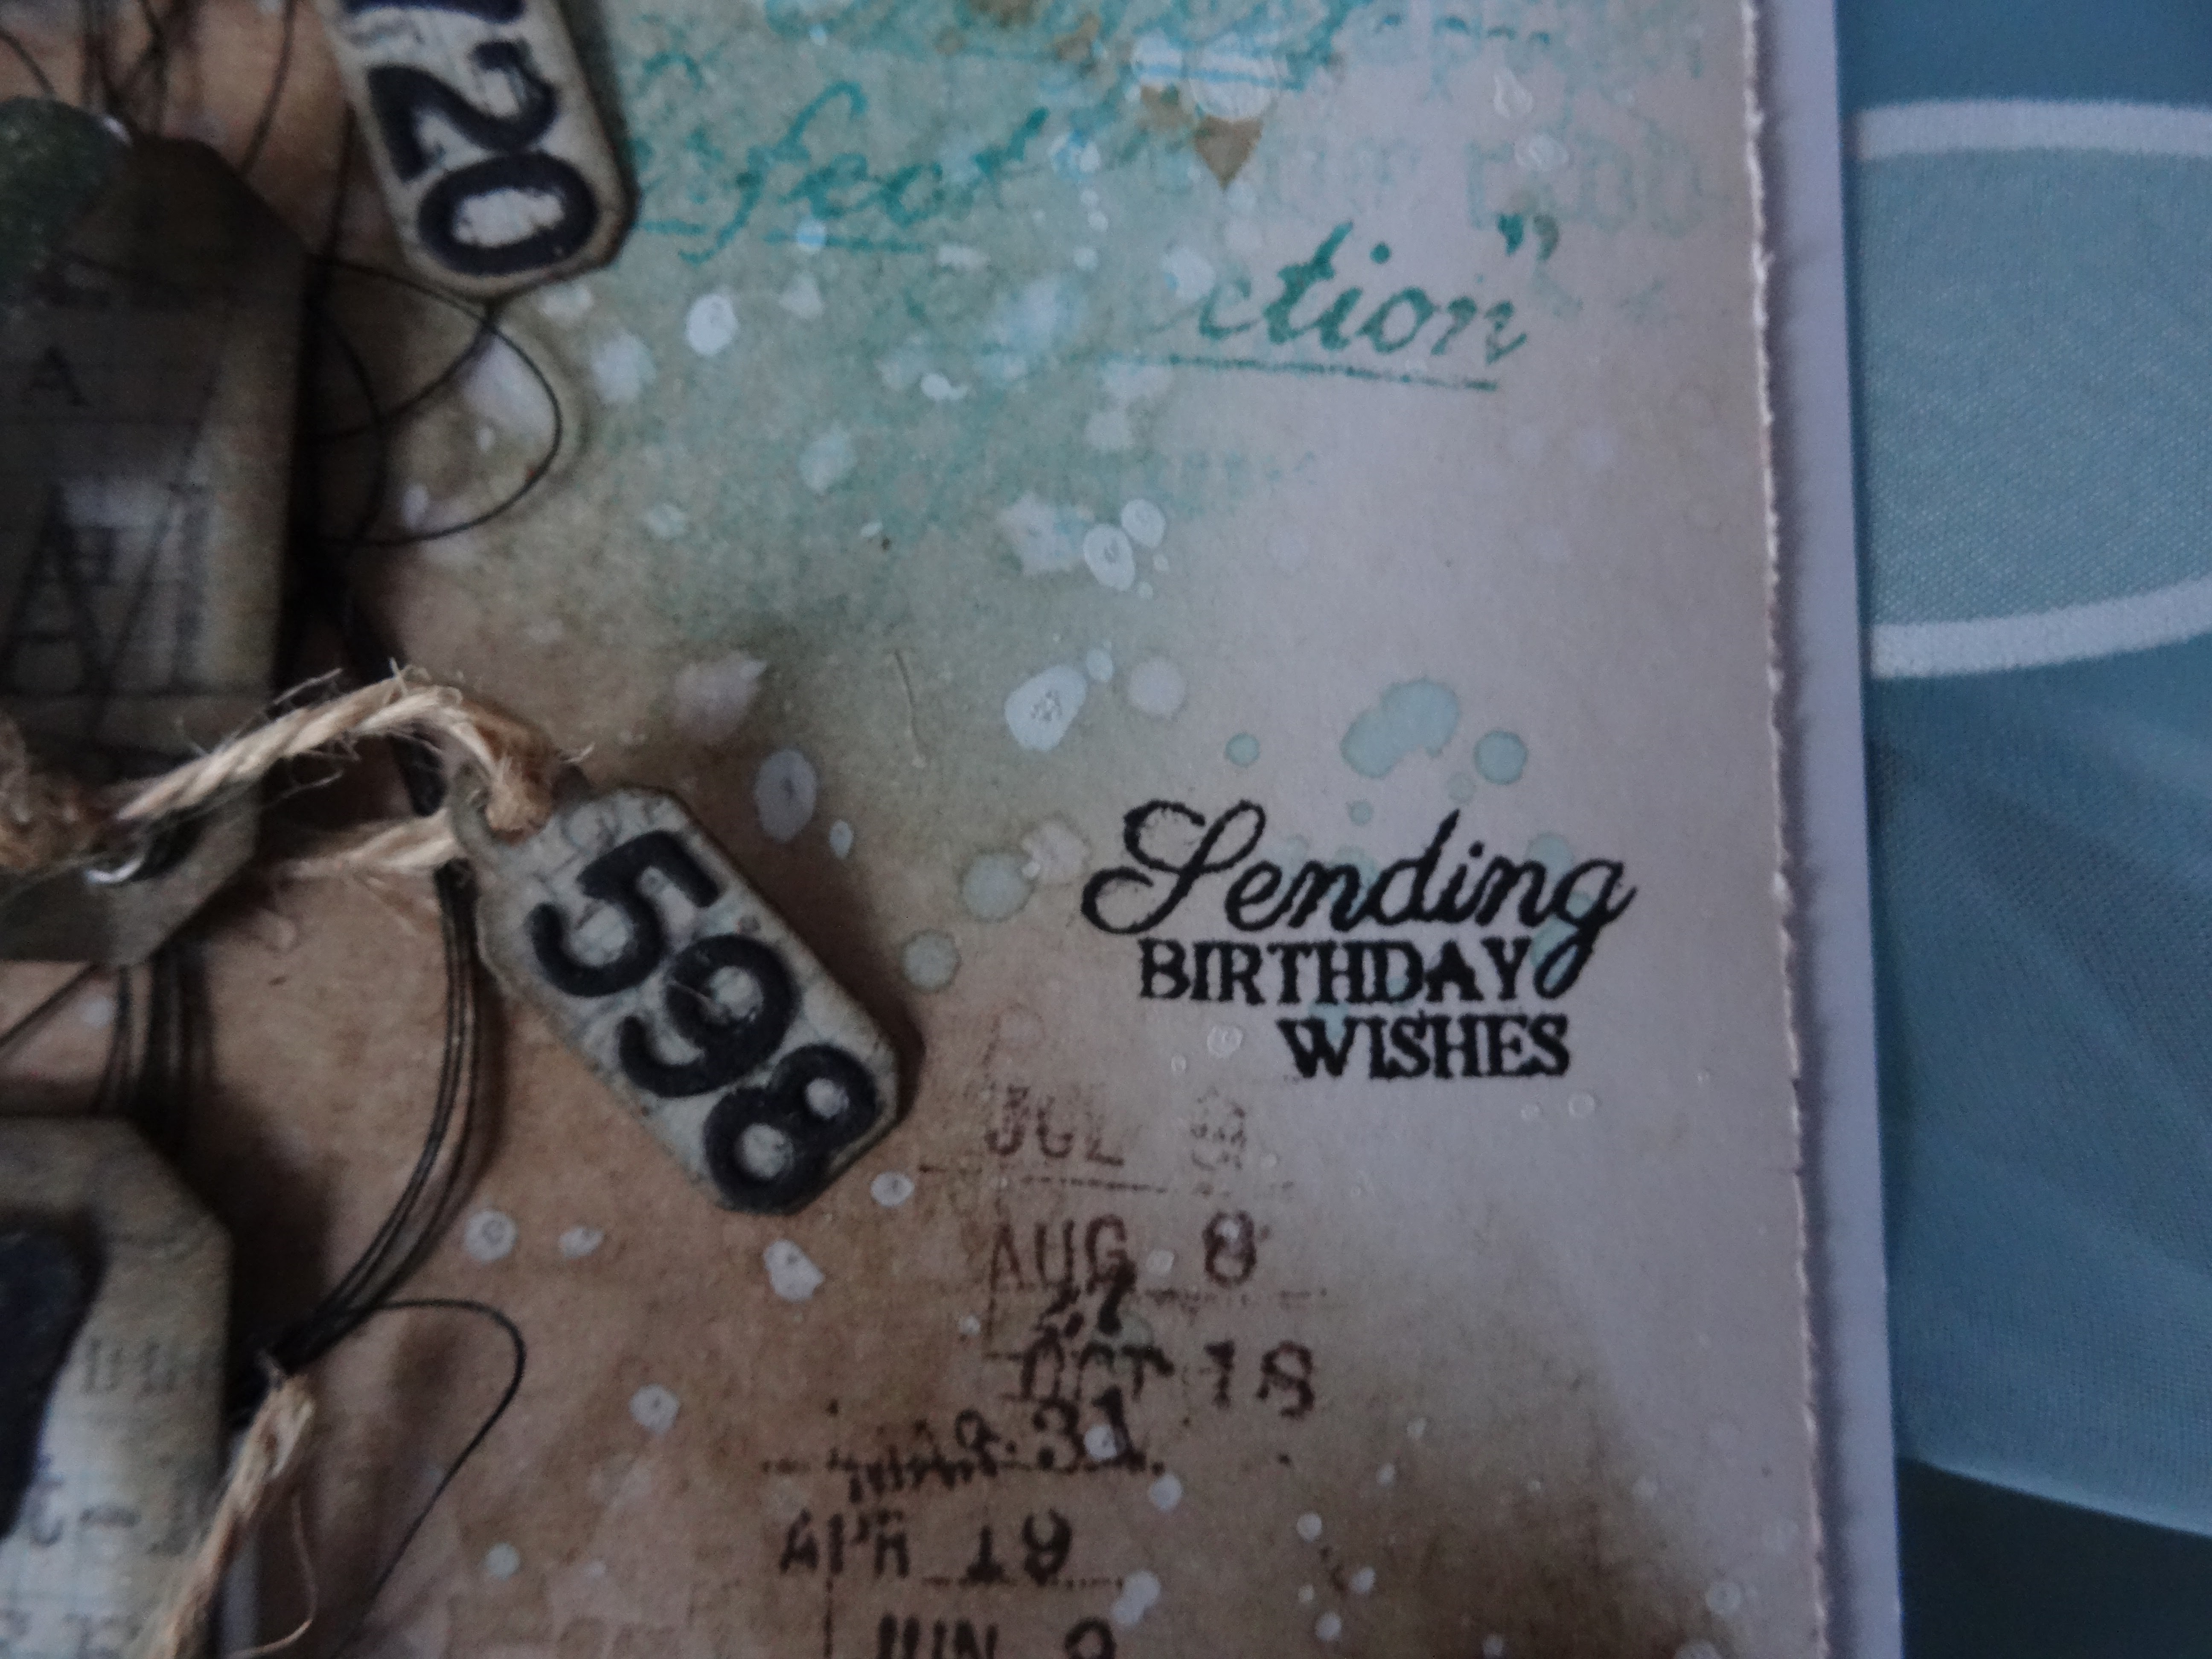
Finally I stamped the little sentiment with black Versafine Ink directly onto the card. I love this stamp, it is so small and pretty!


I attached the topper to a card - and that´s it!


Here are some close ups:


Now I hope you will find some time to make a card for our challenge, you can win a 20 £ voucher for the shop!

Thank you for your visit today and have a sunny March!

Dienstag, 5. Mai 2020

Another Birthday Card

Hello my friends, 
welcome to my second inspiration post for the May challenge at Country View Challenges, the theme is Tea Party/Birthday Party.

This time I made a card for a man.


For this card I used a precolored paper, I guess I used watercolors, spritzed with water.
I stamped some marks with a PaperArtsy Mini stamp EM 47 with Mermaid Lagoon Distress Oxide for some interest.


Now I used the Manuscript Stencil from finnabair with modeling paste to bring more texture to the background.


Last I layered some old book pages, kraft paper scraps, a part of a paper doily and arranged on top a paper doll from Tim Holtz.  Some flowers and a stamped congratulation finished my male card.


That´s it from me for today. 
Now it´s your turn, I hope, you will find some time to make something for our Tea Party theme!

Thank you for your visit and take care!

Samstag, 5. November 2016

Rusty Card for the Canvas Corp Brands

Hello all,
today I want to show you a little rusty card I made for the Canvas Corp Brands November Challenge.

ccb-november-2016-challenge-movember

Hop over to the blog to see more, there is a gorgeous prize to win!
I hope, you´ll find time to join in!


I used the Naturaly Aged Kit "Rusty Metal for the card. I´ll make a video tutorial soon!


I hope you like my little card!
I wish you a wonderful weekend!

Donnerstag, 1. September 2016

Live Your Dreams


Hallo zusammen, schön, dass ihr bei mir hereinschaut!
Heute ist der erste September und das heißt, Zeit für eine neue Herausforderung bei Country View Challenge! Diesen Monat lautet das Thema: "Reise", ausgewählt von der talentierten Jennie.

Hello all, nice to have you here!
Today it´s the first of September and that means time for a new Challenge over at Country View Challenge! This month the theme is: "Travel", hosted by the talented Jennie.


 Als ich jung war, liebte ich es mit dem Motorrad zu verreisen. Ich fuhr zwar nie selber, ich war nur Beifahrerin, aber ich habe immer das Gefühl von Freiheit und von (ein klein wenig)  Abenteuer genossen ;-). Nun, diese Art von Urlaub möchte ich heute nicht mehr machen - es ist eine sehr spartanische Art des Reisens: zwei T-Shirts, ein Paar Hosen, ein Handtuch, Unterwäsche und eine Zahnbürste, das ist alles, was man einpacken kann. Ein kleines Zelt und eine Isomatte, mehr kannst du auf einem Motorrad nicht mitnehmen. Heute bevorzuge ich ein bisschen mehr Komfort, aber ich erinnere mich an diese Tagen mit einem Lächeln.

 When I was young, I loved to travel by motorbike. I never drove one myself, I only was a back-seat-driver, but nevertheless I always enjoyed the feeling of freedom and (a little bit of) adventure ;-). Well, this way of holidays is not the way I´d love to go today - it is a very unpretentious way of travelling: you only have space for two T-shirts, one pair of pants, a towel, underwear and a toothbrush, that´s it. A little tent and a sleeping pad, more you can´t carry on a motocycle. Nowadays I prefer a bit more comfort, but I remember these days with a smile.

Für meine Karte habe ich einige der Papiere von dem Papierset Correspondence von Tim Holtz verwendet. Ich habe das Hintergrundpapier mit ein paar Tattered Angels Glimmer Mists (Burnt Red, Olive Vine, Tattered Leather) besprüht. Das Motorrad (Stempel von LaBlanche) habe ich auf Stempelpapier gestempelt und mit DI (weathered wood, fired brick) eingefärbt. Die distressten Ränder des Papiers und des Stempelbilds habe ich noch mit DI ground espresso and abandoned coral coloriert. Zum Schluß noch einige Metallzahnräder und kleine Blüten als Verzierung und das wars.

For my card I used some of the papers from the Tim Holtz paper pad Correspondence and misted it a little bit with Tattered Angels Glimmer Mists (Burnt Red, Olive Vine, Tattered Leather). I staped the motorcycle (LaBlanche) on a specialty stamping paper, colored it with DI (weathered wood, fired brick). The distressed edges of the paper and the stamped image I coloured with DI ground espresso and abandoned coral. The sentiment is a stamp from the Dovecraft Bohemian clear stamp set. Last I embellished the card with some metal gears and some tiny flowers.
Here are some close ups: 


Vielen Dank fürs Reinschauen und vielleicht macht ihr bei unserer Challenge mit, ihr könnt einen £ 20 Einkaufsgutschein bei Country View Crafts gewinnen.
Thank you for dropping by and I hope, you´ll join our challenge this month! You have the chance to win a £20 Country View Crafts voucher.

Samstag, 23. Juli 2016

Steampunk Fantasy Card

Hello all, it´s a very busy time here at the moment, the school year is nearly at it´s end, holidays are in sight and many, many little things are to do and to finish. 
As I am the birthday card maker for all collegues at our school and also asked, when there is something to alter or decorate for a gift, I have to do much right now.
Today I want to show you one of the cards I made for a collegue (sorry, the photo is not the very best):

 Over at Country View Challenge we have this month the challenge theme: circles. This is my second piece for it.
And what could be better fitting there than steampunk wheels, manometer and gears! 
I used a set of papers and embellishments from LaBlanche and another set called fantasy, which includes gorgeous images. One I used here.
Here are some close ups:

 Here you can see some of the gears and a manometer - so cool!
 Here I used a circle metal embellishment - you can find circles nearly everywhere! ;-)
 for the background I used a stencil from Tim Holtz (one of my favourites) with DI in rusty hinge, then I randomly rubbed slitely some golden Inka gold. I splattered some gesso and black gesso for more interest (circles too =) )
The circle framed numbers are adorable! I love this set!

That´s it for today, I´ll show you more of my latest creations next time, so stay tuned!

Sonntag, 1. Mai 2016

Heroes - Card for a Man

Hello all, nice to have you here!
it´s time again, a new month and a new Challenge over at Country View Challenges! This month the theme is "Use a Stencil". Just made for me, because I love to work with stencils! There are soooo many possibilities to use them.
I made a birthday card for a collegue and used several stencils in different ways.

This month alongside our Challenge, we are also running a Blog Hop with a Sizzix Big Shot Machine & Die Bundle as the prize. To enter, you must be a Follower of our Challenge Blog and Hop along to each of our Design Team Members Blogs and leave a comment. We will still be running our normal monthly challenge and those who link their Use A Stencil projects will also be entered into our £20 Voucher draw. The Winners will be picked at random in early June. So hop on over to Christine's 1st Project - Use A Stencil

Christine
Gabrielle
Jennie
Rachel
Sue
Evelyn
Doreen
Nikki
Monika
Hazel
Brenda
Corrie
Jane


Hallo zusammen, schön euch hier zu haben!
Heute ist es wieder soweit, neuer Monat und eine neue Herausforderung bei Country View Challenges und ein BLOG HOP MIT EINEM SAGENHAFTEN PREIS!!!!! Um den Preis gewinnen zu können, müsst ihr ein follower von Country View Challenges werden, zu allen Blogs der Hop-Liste (siehe oben) hüpfen und dort einen Kommentar hinterlassen - einfach, oder? Es gibt aber auch einen "normalen" Preis von £20, einlösbar im Shop, zu gewinnen - Werk verlinken und mitmachen.  Diesen Monat ist das Thema "Use a Stencil". Wie für mich gemacht, ich liebe das Arbeiten mit Schablonen! Es gibt sooooo viele Möglichkeiten mit ihnen zu arbeiten.
Ich habe eine Karte für einen Kollegen zum Geburtstag gemacht, bei der ich ein paar Schablonen auf unterschiedliche Weise verwendet habe.


Und so habe ich´s gemacht:
Here you can see how I made it:
Als erstes habe ich ein Papier in der passenden Größe zugeschnitten, die Ränder distressed und mit Distress Ink "rusty hinge" eingefärbt.

First I cut a cardstock to the right size, distressed the edges and colored them with DI "rusty hinge".

Danach kam die erste Schablone zum Einsatz. Ich habe Strukturpaste mit einem Spatel in den Ecken aufgebracht - kleiner Tipp: es sieht oft schöner aus, wenn man nicht die ganze Schablone benutzt.

Now the first stencil was used. I randomly put some structure paste with a spatula at the edges - little hint: it looks better most of the time when you only use some parts of the stencil.

Damit das Weiß der Paste keine so harten Kontrast zum Hintergrund bildet, habe ich ein paar Sprühfarben zum Einfärben benutzt.

For not being such a hard contrast of the white paste to the background, I used some mists for coloring.
Für den Mittlepunkt habe ich eine weitere Schablone verwendet, in die ich erst mit einem kleinen Schriftstempel gestempelt habe.......

For the focal point I used another stencil, in which I first stamped with a little script stamp.......

 ......und danach mit DI "rusty hinge" mit Hilfe eines Blending Tools eingefärbt habe. Natürlich würde das auch mit einem anderen Schwämmchen funktionieren.

........and afterwards colored with DI "rusty hinge" using a Blending Tool. Of course you can use any other sponge too.

Nun habe ich noch zwei weitere Herrenschablonen in der Wischtechnik darüber gesetzt, hier habe ich DI "walnut stain" für den rechten Herrn und DI "black soot" für den oberen Herrn benutzt.

Now I used two other Gentleman stencils, overlapping the first one. I used DI "walnut stain" for the right one and DI "black soot" for the Gentleman on top.


Um den mittleren Herren noch etwas mehr herausstechen zu lassen, habe ich ihn mit WOW Embossingpulver "Clear Gloss Ultra High" zwei Mal überzogen.

To make the man in the middle stand out more, I embossed him twice with WOW embossing powder "Clear Gloss Ultra High". 

Zuletzt wurde der Hintergrund mit DI "tumbled glass" und "faded jeans" eingefärbt, der Spruchstempel: "Wir sind die Helden unserer eigenen Geschichte" aufgestempelt, mit einer alten Plastikkarte noch ein paar Striche aufgebracht und der Mittelpunkt war fertig.

The last step for the focal point was to color the background with DI "tumbled glass" and "faded jeans" and to stamp the sentiment "We are the heroes of our own story".

Das Stempelbild habe ich noch mit ein paar Papierabschnitten hinterlegt und auf die Karte geklebt. Als Verzierung habe ich ein paar 3D-Kugeln eingefärbt und mit einer Blume und einem Holzzahnrad verziert.
I matted the stamped picture with some scraps of paper and glued it down to the card. I embellished the card with some colored Art Stones, a paper flower and a wood gear.

Some close ups:


Ich hoffe, meine Herrenkarte gefällt euch und ich konnte euch ein wenig inspirieren!
Vielleicht findet ihr ja Zeit, bei unserer Challenge mit zu machen!
Now I hope you like my male card and you feel a bit inspired!
May be you find time to join our challenge this month!

Vielen Dank für´s Vorbeischauen!
Thank you for dropping by!