Gesamtzahl der Seitenaufrufe

Posts mit dem Label crackle paste werden angezeigt. Alle Posts anzeigen

Mittwoch, 1. Januar 2020

Square Page for Rubber Dance

Hello all, welcome to 2020 and Happy New Year again!

Here is my page for Rubber Dance and we have - brandnew, for the brandnew decade - a Mood Board you can work after. This month it is simply delicious!

Bild könnte enthalten: Text

I made a 15 x 15 square page - don´t know, if I will make a new art journal with it or may be I´ll create a calender with? We´ll see.


If you want to see, what my talented team mates made, please hop to the Rubber Dance blog!

Here are some more pictures:


Now I hope you feel inspired by the wonderful Mood Board and join in with!
Thank you for your visit today!

Stamps:
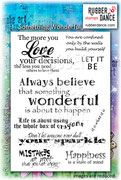
Something Wonderful
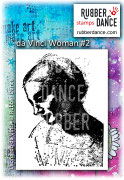
Da Vinci Woman #2
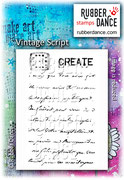
Vintage Script

....To The Moon And Back

Happy New Year my friends!
Today a new decade has started - unbelievable!

For our new challenge at Country View Challenges the lovely Monika has chosen the theme "Love".
I made a card for my daughter, inspired by the work of the gorgeous Veerle Moreels


I used a piece of watercolor paper, applied some watered down green and brown acrylicpaint on a piece of acetate, spritzed the watercolor paper with water and pressed the acetate on top of it. This gives a really subtile and unique spreat of color. I really love this!

When everything was dry, I stamped one ring from the stampset from PaperArtsy Eclectica3, designed by Seth Apter ESA12 with watering can Archival ink and toned it down with white Gesso. I also highlighted the inside of the ring with white Gesso.

Now I applied trasparent crackle paste from Stamperia in a pretty thick layer to my surface and left it to dry over night to let the magic happen - oh, and look! It crackled so nicely!

I brushed carbon black Antiquing Cream into the cracks and took away the excess with a dump cloth. Then I used Inka Gold Greenyellow to make it fit better with the background.

The tiny heart I made with clay. I colored it with Ecoline Liquid watercolor Carmine and added some glossy glaze on top. Then I glued it into the ring.

I randomly stamped a scriptstamp from another Seth Apter PaperArtsy stamp from the ESA10 stamp set with Distress Oxide peeled paint, sprinkled some of the same Ecoline Liquid watercolor in carmine as I used for the tiny heart and shaded the crackled area and the edges with grey charcoal.

Last I stamped the sentiment from the Rubber Dance stamp set "You Rock" on tissue paper and glued it down with matte medium.

I put the card together - and ready!

Here are some close ups:


That´s it for today! I hope you like my card and feel inspired to make something love-ly for our challenge too!

Thank you for your visit!

Samstag, 1. September 2018

DIY Travel Note Book for Country View Challenges

Hello dear visitors, nice to have you here!

While you are reading this post, I am still on vacancy with my daughter in the USA.... or may be we are in Canada right now? 😀

What a big adventure and a big, big dream coming true!
We are travelling three weeks from New York, the coast up to Quebeck over Montreal and Toronto to the Niagara Falls and then back to New York before we go home again.
Wow! I can´t believe it! I´m writing this one day before we start, I´m so excited!

Well, I needed a Travel Note Book - of course we want to see as much as possible and I don´t want to forget anything! So I made this.
Fitting to the September challenge over at Country View Challenges "Planes, Trains, Automobiles", hosted by the lovely Miriam, I decorated the cover with a plane and a shrinked stamped Automobile.


Today I don´t have steps or a video for you - I had no time, sorry!

I made this book some time ago, but I measured the cover wrong and I didn´t like the paper I covered it, so I took it and changed the look.
This is what it looked before:


Well, pretty, but...

I took some papers from the Tim Holtz Correspondece Paper Pad and made the cover new.


← Front


             Back →


 ← Front inside


Back inside →


I added some checkered paper to the binded notebook to have more space for more notes, e.g. expenditure, notes, ...


I played with some mists, crackle paste through a stencil and stamps, stamped the title, fuzzy cut the aeroplane and put everything together. 


Then I added a eyelet and threaded a leather string through.


←front


back →


Here are some close ups:


 The inside I will show you, when I am back - hopefully filled with beautiful memories, so stay tuned!
Well, meanwhile I hope, you will find the time join in with our challenge this month, so that I´ll get to see some pretty makes from you when I come home!

Thank you for your visit today and have a good time.