Gesamtzahl der Seitenaufrufe

Posts mit dem Label Tim Holtz werden angezeigt. Alle Posts anzeigen

Mittwoch, 21. Juni 2023

Once Upon A Time....

Hello everyone and happy Wednesday!

For my second project for the "Vintage" challenge at Country View Challenges  I made a page in my little art pad.


It´s a quick and simple page, because I am in the middle of chaos at home. I renovate my floors and I have to put all furnitures from one room to the other. And being in the flow, I renew some of my cupboards (sand them and paint new), paint the walls etc......
Well, time for crafting and being on social medias is rare you can imagine!
Therefor it will be a short post.


This is what I did:
I brushed vintage photo DI over the page, sprinkled water on top and let it dry. Then I stamped with Archival ink coffee the first Tiny prints stamps from Tim Holtz randomly to the background and then the second one with Archival ink sepia randomly on top.
I stapeled some paper pieces from my stash together after I distressed the edges with vintage photo.
I glued them down with foam tape and glued a picture from the Vintage Photobooth pad from Finnabair as a focal point to the cluster. I stamped the words with black Archival ink directly onto the page and last I tied a little bow with a yarn and a silver string. I took a cap from a bottle and made some rings with DI evergreen bough to finish the page - That´s it!


That´s it from here for now.
I hope, you will join in with our challenge this month, there is enough time left to make something vintage. You know, you have the chance to win a 20 £ voucher for the shop!

Thank you for your visit today!


Donnerstag, 1. Juni 2023

Art Journal Page "Be You"

Hello and happy June!

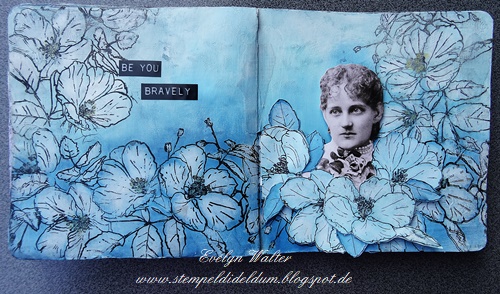
For the new challenge over at Country View Challenges with the theme "Vintage" I made an art journal page.


This is what I did:

(I apologise for the bad quality of the pictures, I guess I had bad light)

I wanted to try out the faux bleeching technique, which Tim Holtz showed in one of his lives.

I prepared my pages with some snippets of old bookpages to cover some paint and then I spreat white Gesso over the whole page and let it dry.

Now I took DO speckled egg, salvaged patina and uncharted mariner and blended the colours from light to dark from the top of the page downwards. I used a blending brush.


Time for stamping!
I used  one of the floral trims stamps and Versafine  onyx black ink and stamped around the pages.


Now I used a waterbrush and lifted some of the DO ink to "bleech" the florals. The result is sooo amazing!


I prepared another piece of paper, stamped the floral trim again, "bleeched" the flowers and cut them out.


I chose one of the paper dolls Portraits, put some foam pads to it´s back and glued it to the page. The fuzzycut flowers I glued around the portrait. Now I only had to glue down the saying (TH label stickers "thoughts"). 


Here are some close ups:


I hope you like my pages as much as I do and feel inspired to make something vintage for our challenge this month. As always you can win a 20£ voucher for the shop!

Thank you for your visit!

Sonntag, 21. Mai 2023

Bon Voyage!

Hello and happy sunday!

Today I want to share my second make for the May challenge "vehicles" at Country View Challenges

This time I made a card.


I took a piece of watercolour paper and coloured it very lightly with a blending brush. I used DI brushed corduroy and festive berries. The edges  I distressed with walnut stain. Next I stamped the background with my new stamp from the Tiny Prints stamp sets from Tim Holtz. I stamped it randomly with VersaFine Clair Pinecone. 


Now I stamped the focal point, an older stamp from LaBlanche I had in my stash. I love the old locomative! I stampde it with VersaFine Clair Chianti.


I added some "smoke" with DI walnut stain, brushing lightly over the chimney. Then I grabbed some tiny flowers and glued them to the card. Last I printed "Bon Voyage" with my Dymo and glued it down.

Now it´s your turn, there are some days left to make something with vehicles for our challenge.

As always you can win a 20£ voucher for the shop.

Thank you for your visit today!

Montag, 1. Mai 2023

Relax and Go Your Way!


Hello and happy 1st of May!
For the May challenge at Country View Challenges "Vehicles", hosted by the lovely Monika, I made a art journal page with a vitage vehicle stamp.


I started my page with acrylic paint and a stencil. I used Lukas Cryl Terzia Yellow Ochre and spreat the paint all over the page.  In the still wet paint I placed a stencil (LaBlanche) and took away some paint using a baby wipe, I dried the page with my heat tool. Then I added some Amsterdam Standard Series Acrylic paint Phtalo green and Lukas Cryl Terzia Prussian Blue randomly to some places.

Now I needed some lighter areas on the page. For this I used again Lukas Acrylic paint, this time I used Titanium White. To get a good coveridge, I needed to do 3 layers. For more dynamic I brushed slightly over the edges of the areas - I like, how this turned out!

Time for stamping now!
I stamped the two men on the vehicle on tissue paper with versafine pigment ink for fine detail in oniyx black and glued it to the page with Liquitex Matte Medium. I did this, because the paper of my art journal is not smooth and the stamp image would not turn out crisp. If you glue down the tissue paper to the page with matte medium, it is not visible, that there is another layer of paper!
I coloured the stamped image with my Faber Castell Polychromos and added some black charcoal to ground the image.
I also stamped some pattern to the background with a stamp from the eccentric  stamp set CM448 from Tim Holtz and a compass stamp from LaBlanche to add more interest.

Next I used a cheap napkin with a leave pattern, cut out some of the branches and glued them down with matte medium. You really have to be careful to avoid tearing the napkin! I outlined some of the leaves to make them stand out a little bit more.

Lastl step was to print the words withmy Dymo lable maker. I cut the words and coloured them with a green and a brown felt pen, glued them to the page and scribbled around them with a black fineliner.


That´s it for today! I hope, you will find time to join in with our challenge this month! As you know, you can win a 20 £ voucher to spend in the shop!
Thank you for your visit and have a sunny month!


Samstag, 25. März 2023

Best Wishes!

Hello and welcome to my blog!

Today I want to share with you a quick and easy birthday card for a man. It´s my second project for the March challenge at Country View Challenges "Birthday card for a man"


For the background of my card I used a elder paper pad from Tim Holtz. I simply distressed the edges with DI ground espresso, used one of my all time favourite stencil from TCW called Mini Harlequin. I spreat pentart Deluxe paste lagoon blue and truffles randomly through it. After the paste was dry, I made some white splatters with acrylic paint and glued the panel on top of a card.

The focal point is Sir Vagabond I fuzzy cut from the 8 x8 paper pad. I gave him a coat of glaze for more interest and glued him with 3D foam pads to the background. I also glued down two circles from the same paper pad.

I took a flower diecut from LaBlanche and put it in Sir Vagabonds hand, then I stamped the birthday wishes on leftover cardstock, cut it to size and went with black ink around the edges. Then I found a place on my card and used foam tape to glue them down too.

Here is Sir Vagabond:


There are some days left to make a male birthday card for the challenge, you know, you can win a 20 £ voucher for the shop!

Thank you for your visit today and have a happy weekend!

Mittwoch, 1. März 2023

Sending Birthday Wishes!

Hello and happy March!

I can´t believe it - it´s March already, where did February go?

For the March challenge over at Country View Challenges the lovely Corrie is the host and she wants to see birthday cards for a man.

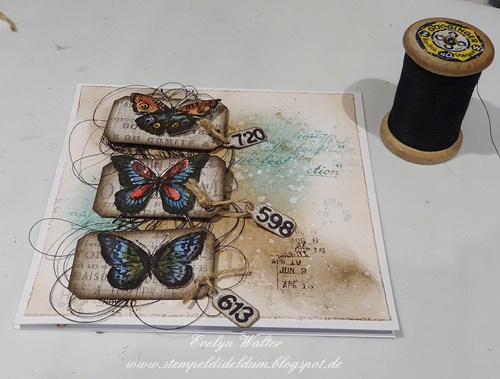
I made a little bit grungy card with a lot of new stamps and dies!


I started by colouring my background with Distress inks (walnut stain and salvage patina) with a brush, added some water drops and spritzed with a brush watered down walnut stain. Later I added some background stamping with my also new visible image stamps "Distressed Christmas" and "Background Vision" with the same Distress Inks.

I used my new purchased dies from Tim Holtz and cut out tiny tags and labels. I used some older papers from Tim Holtz.

For my focal point I used - well, also new - the butterflies from the stamp set "Watercolor CMS217" and coloured them with inktense colours and activated them with a waterbrush.

The labels were distressed with ground espresso DI and I added some eyelets. On top of the tiny tags I glued down some numbers I diecut and attached them to the labels with a string.

Underneath the labels I arranged some black thread, put some 3D tape down and glued the butterflies on top.

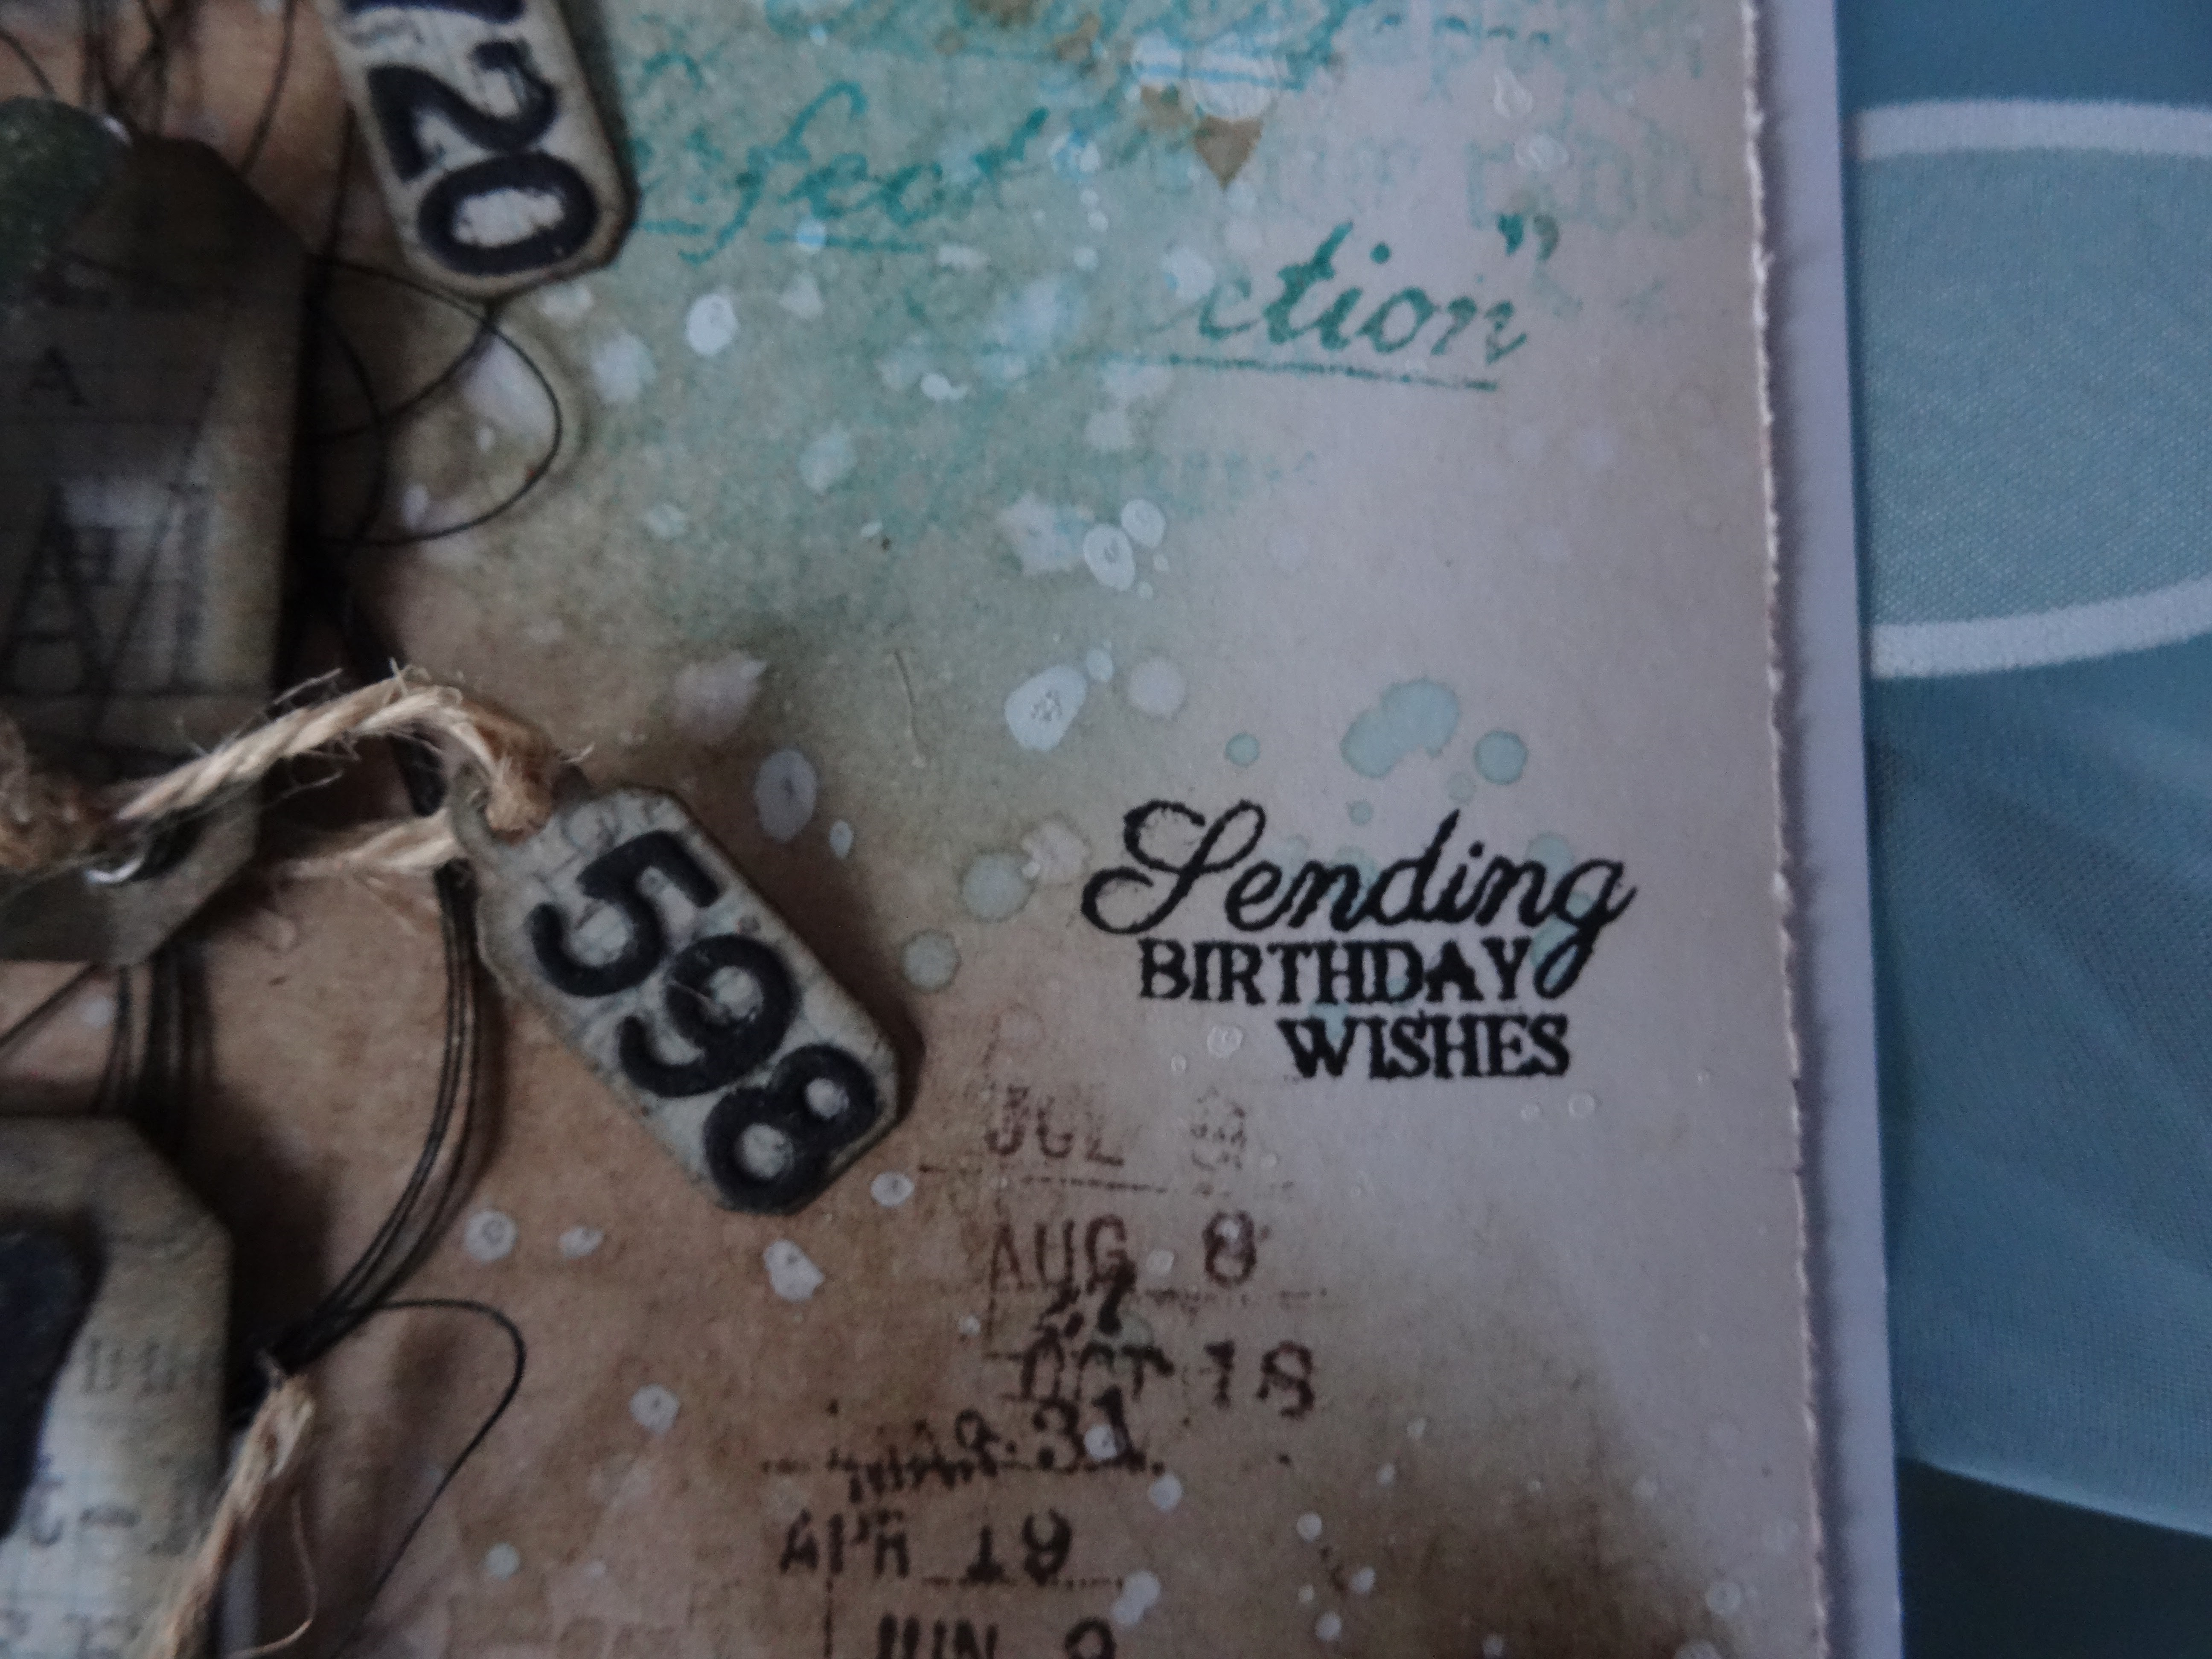
Finally I stamped the little sentiment with black Versafine Ink directly onto the card. I love this stamp, it is so small and pretty!


I attached the topper to a card - and that´s it!


Here are some close ups:


Now I hope you will find some time to make a card for our challenge, you can win a 20 £ voucher for the shop!

Thank you for your visit today and have a sunny March!

Dienstag, 1. November 2022

Butterfly Tag

Hello and welcome to November!

For the challenge "Tags only", hosted from the lovely Jo, at Country View Challenges, I made a pretty simple tag. I took my Gelli Plate and had a little fun session. This is, what came out.

I made some blue prints in different shades of blue first and diecut the beautiful butterflies from Tim Holtz.

Then I spreat out violet, magenta and light blue acrylic paint on my page and printed it on a tag. Then I put some jeans blue acrylic paint in a thin layer on the Gelli plate, put an old blue jeans on top and pulled the print with my tag. I was so very excited how it turned out (so that I forgot to take a photo, sorry).

When the paint was dry, I gave some modeling paste through a stencil randomly to the tag and put it away to dry.

Meanwhile I made my butterflies. I diecut the pieces and glued them together and glued the butterflies down on my tag.

Now I distressed the edges with black Archival ink, printed the words with my Dymo label maker to embellish the tag and added three ribbons in fitting colours at the top hole and that´s it!

I hope you like my tag as much as I do!

Here are some more pictures:


Now it´s up to you to make a tag for the challenge! You can win a 20 £ voucher to spend in the shop!

Thank you for your visit!

Donnerstag, 3. März 2022

Just for You!

 Hello lovelies!

Welcome to my second post for the March Challenge "Mother´s Day" at Country View Challenges!

I made another card. As I liked the first one very much, I wanted to make a second one with slightly different supplies.

This time I used again a layering stencil from Tim Holtz, floral THS077 and used modeling paste to bring the pattern on the paper.

When it was dry, I took infusions, magenta and bit jaded. I mixed a small amount with water and brushed the colours on my page. This way I had some more control where the colour would go. I added some layers and dried between. Lastly I sprinkled some colour to the clean right side..

I wanted to seal the surface and tried out the Transparent Wax from Stamperia. I smeared it on the surface with a dry cloth - and it worked very well! ...and the card smells very good now =).

I stamped the text with a very old stamp, coloured the cardstock with the leftover infusions, cut it out, matted it and adhered it with foam tape to the card.

To make it even more elegant, I  brushed some golden metallic acrylic paint (DecoArt Extreme Sheen 24KGold, my favourite golden metallic paint) and added some spritzes at last. Then I glued it to a gold matallic card.


I hope, you liked my cards and feel inspired to make something beautiful for your mum too!

Thank you for your visit today!