Gesamtzahl der Seitenaufrufe

Posts mit dem Label acrylic paint werden angezeigt. Alle Posts anzeigen

Montag, 1. Mai 2023

Relax and Go Your Way!


Hello and happy 1st of May!
For the May challenge at Country View Challenges "Vehicles", hosted by the lovely Monika, I made a art journal page with a vitage vehicle stamp.


I started my page with acrylic paint and a stencil. I used Lukas Cryl Terzia Yellow Ochre and spreat the paint all over the page.  In the still wet paint I placed a stencil (LaBlanche) and took away some paint using a baby wipe, I dried the page with my heat tool. Then I added some Amsterdam Standard Series Acrylic paint Phtalo green and Lukas Cryl Terzia Prussian Blue randomly to some places.

Now I needed some lighter areas on the page. For this I used again Lukas Acrylic paint, this time I used Titanium White. To get a good coveridge, I needed to do 3 layers. For more dynamic I brushed slightly over the edges of the areas - I like, how this turned out!

Time for stamping now!
I stamped the two men on the vehicle on tissue paper with versafine pigment ink for fine detail in oniyx black and glued it to the page with Liquitex Matte Medium. I did this, because the paper of my art journal is not smooth and the stamp image would not turn out crisp. If you glue down the tissue paper to the page with matte medium, it is not visible, that there is another layer of paper!
I coloured the stamped image with my Faber Castell Polychromos and added some black charcoal to ground the image.
I also stamped some pattern to the background with a stamp from the eccentric  stamp set CM448 from Tim Holtz and a compass stamp from LaBlanche to add more interest.

Next I used a cheap napkin with a leave pattern, cut out some of the branches and glued them down with matte medium. You really have to be careful to avoid tearing the napkin! I outlined some of the leaves to make them stand out a little bit more.

Lastl step was to print the words withmy Dymo lable maker. I cut the words and coloured them with a green and a brown felt pen, glued them to the page and scribbled around them with a black fineliner.


That´s it for today! I hope, you will find time to join in with our challenge this month! As you know, you can win a 20 £ voucher to spend in the shop!
Thank you for your visit and have a sunny month!


Samstag, 1. April 2023

Change is Beautiful!

 Hello and welcome to April!

As always on the first of a month, there is a new challenge over at Country View Challenges, this time the theme is "Things with Wings", hosted by the lovely Rachel.

I made a card with a beautiful butterfly.


I cut a piece of white watercolour paper to size and smeared 4 different colours acrylic paint with my fingers on it´s top. When paint was still wet, I used a stencil from finnabair and a dump baby wipe to wipe off some paint to create texture. For even more texture, I took another stencil from finnabair and black paint and stenciled some words here and there.

When dry, I used white acrylic paint to push down the colour at the part, I wanted to stamp the butterfly. I dried it again and then I stamped the butterfly with versafine Fine detail ink. I stamped it 3 times for a crisp image. I also stamped the sentiment on a leftover piece of paper.  After this I made some dots with a big white Posca pen and some smaller black ones to break the pattern. I glued the panel to the card.


Next I coloured the butterfly with my Polycromos. I used the colours from the background, just a little more intens. Then I glued down the sentiment with foam tape and last I made some 3D dots with a glitter perl pen.


Here are some more pictures:


That´s it for today!
Now it´s your turn to make something with "Things with Wings", I am curious, what you will make!

Have a wonderful April and see you at Easter sunday with my second make.
Thank you for your visit today.
xxx


Mittwoch, 12. Mai 2021

Haute Couture

 Hello lovelies, nice to have you here!

It´s my second make for the challenge "We Will Always Have Paris" over at Country View Challenges.

This time I made a journal page in my little note pad.


As you know, Paris is one of the most famous cities of fashion! Many well known fashion designer started their carreer in Paris.
So I made a page which shows a atelier of a fashion designer - may be it´s Coco Chanel´s?
There are no dresses, because it´s fashion week and the models are on the cat walk right now 😉


I started with this Lady. She was stamped on a shrink foil, colored with color pencils and shrinked with a heating tool - it is still fascinating to watch the motive shrink! I glued her into a golden frame I had in my stash.

Then I painted the page using Amsterdam acrylic paint in sky blue light using a brayer. Then I stamped a tapestry with VersaFine Clair warm breeze and toned everything down with white acrylic paint.
The dress forms I stamped, colored and cut out, then I glued them down to the page - one directly and the other one with foam tape. 

The little buttons and the perfume bottle are frome a very old stamp set, as well as the word stripe.

Here are some close ups:


That´s it for today!

I hope you feel inspired to make something beautiful for our Paris challenge too!

As you know, you can win a 20 £ voucher for the shop!

Thank you for your visit!

T

Mittwoch, 17. März 2021

Hopes and Desires

 Hello everybody, 

this is my second project for the March Challenge over at Country View Challenges "Silhouettes", hosted by the lovely Rachel.

 This time I made an art journal page, having the endless pandemic in mind.


I used a 300gsm watercolor paper as my base and rolled some acrylic paints all over the page with my brayer. Next I used Amsterdam acrylic paint in neon colors: reflex rose, reflex yello and reflex orange. I used a palette knife to spread it randomly over the page.
Now I used 2 different stencils from Tim Holtz, you will find a wide range of Tim´s stencils in the shop. I used a sponge and blue and black paint.
For the silhouettes I used an old Andy Skinner stencil and stenciled the children with black paint directly on the page. It was not easy to get a crisp image, because the watercolor paper is very textured.
The balloon is from the same stencil and I drew it with a pencil and filled the gap with glue. Then I sprinkled pink glitter into the glue.
Now only some washi tape to ground the kids and the sentiment. It´s from the sentiment sticker book from finnabair.
Last I glued the black and neon pink edged paper to black cardstock.

Here some close ups:


I hope you like my page and feel inspired to join in with our challenge! You know, you can win a 20 £ voucher for the shop!


Thank you for your visit today and have a good time!

Freitag, 23. Oktober 2020

"1 Stencil 12 Ways" Past Creative Team Hop with a Stencil from Shawn Petite

Hello lovelies!

Today I want to share my project for the  "1 stencil - 12 ways" Past Creative Team Hop YouTube Hop!


11 past Creative Team Members and Shawn Petite herself used the same stencil to create something beautiful. We all used the stencil Fall Leaves with masks 8 x 10 stencil. I decided to make an art journal page.


And as it is a YouTube Hop - here is my video!


You will find all the links to the other videos in the description box below the video.

I hope you enjoy the hop!

Thank you for your visit today!


Sonntag, 22. Dezember 2019

Art Journal Page "Hope" with Shawn Petite Stencils

Hello my friends!
I want to share a new art journal page with you. I used the new Shawn Petite Christmas Berries and Evergreens stencil and the Shawn Petite Fave Words 2 stencil.


I started with the leftover pieces from my last project for the Shawn Petite Creative Team, you can find everything about it here from the vintage wallpaper 3 and shabby wood and glued them down with matte medium.

I then added Gesso and different colors. The candle with it´s candle stand I drew by myself, but you can find a lovely stencil on Shawn Petit´s shop here. I painted everything with acrylic paints.
Then I stenciled the greenery with a mix of greens and brown and set some highlights and shadows, using Gesso and paints with a paintbrush. Then I surrounded the leaves with a charcoal pencil. At last I stenciled the word Hope onto a tissue paper and adhered it with matte medium.


That´s it for today.
Now I wish you a Merry Christmas and have a wonderful time!

Samstag, 9. November 2019

Welcome Fall - Art Journal Page with Shawn Petite stencils

Hello all,
November already and before I will jump into the christmas projects, I want to share a art journal page I did with Shawn Petite´s new Fall stencils.


 I love these stencils very much!
This is what I did:

I started with old book pages and matte medium. I glued big pieces to my whole page, dried it and gave the page a light wash with white  Gesso.


Then I stenciled the leaves with different colors, yellow, orange, red, violet, green and brown, with Archival Inks through the Fall Leaves with Masks stencil.
After this I used three different pumpkins from the Pumpkins Variety stencil and stenciled them first with white Gesso on the page. After they were dry, I painted them with acrylic paints, shaded the pumpkins and the leaves with black charcoal, 
Last but not least I stenciled the words from the Fall Words 1 stencil to the page and darkened the edges with a black crayon.

 now I hope you like my journal page!
Have a lovely weekend!

Freitag, 1. November 2019

Real Gentlemen - Card for Country View Challenges

Hello everybody, nice to have you here today!


For the November challenge at Country View Challenges I made a card for a man. The theme this month, hosted by my lovely team mate Christine, is Hand Stamped, the vocal image must be stamped, no digital stamps are allowed.

I went through my stamps (well, there are a few 😋😎) and found this stunning gentlemen from PaperArtsy! I really love this stamp, although it is not easy to get a good, crisp print (the stamping platform is enormously helpful!)


This is what I did:

 For my background I used a gear stencil and soft matte gel. When the gel has dried, I colored the page with acrylic paints in teal and brown and used antiquing paint. To grunge it up I scrubbed antique paste over parts of the surface, used DI ground espresso here and there and to color the distressed edges. Lastly I highlighted the stenciled gears with golden wax paste. 
 For even more interest I randomly stamped with brown Archival Ink a script stamp and a postal stamp, both are from PaperArtsy, on top.

My main image I stamped several times with Versafine clair in nocturne and pinecone, colored the faces with DI antique line and colored the background with DI tea dye and darkened the edges with DI ground espresso. Then I put it on a thick piece of cardboard.

I I matted the picture with a distressed piece of cheesecloth, added some diecut, painted gears, a clockface, a flower and some paper rolls. Then I adhered it to a card and lastly I added two metal knobs.

Now I hope, you grab your stamps too and join in with our challenge this month! You know, you can win a 20£ voucher for the shop!

Thank you for your visit today and happy November!

Mittwoch, 16. Oktober 2019

Soulful - Art Journal Cover for Shawn Petite

Hello and welcome today!
Exciting day! This is my first project as a Shawn PetiteCreative Team Member! 
I decided to make a new art journal. First I altered the cover, I made it out of a packaging from Amazon.


You can find more on the blog.

I made a process video, you can watch it here.


I hope you like it!

Thank you for your visit and have a nice day!

Freitag, 20. September 2019

Happy Journal Page 8 for Rubber Dance

Hello lovelies!
Time for a new page in my Happy Journal for Rubber Dance!


If you want to see more, please hop to the Rubber Dance blog!

You can also watch a process video on my YouTube channel:

Stamps from Rubber Dance:

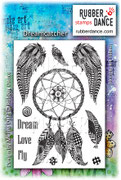
Dreamcatcher

Thank you for your visit today!


Dienstag, 17. September 2019

Creatures from the Deep

Hello all,
today I want to show you my second piece for the September challenge Under the Sea at Country View Challenges.
This time I made an Art Journal Page.

It is a pretty simple page - I told you, that I´m a little bit clueless with this theme.

I found a old book about animals and I cut out two pictures of fishes and glued them down with matte medium. After this I spreat grey acrylic paint around them and dried the page.
Now I took a stencil from Shawn Petite and stenciled the bubbles with a light blue acrylic paint and with cobalt blue Archival Ink.
Then I stamped the words with black Archival ink and set some highlights with a blue pen.
The last step was to darken the edges and to glue the page to a black cardstock.

Here are some close ups:


Now it´s your turn to make something Under the Sea!
Don´t forget, you can win a 20 £ voucher for the shop!

Thank you for your visit and have a good week!


Montag, 1. Juli 2019

Funny Art Journal Page for Country View Challenges


The challenge is hosted by my very talented team mate Corrie this month and she wants to see us use "Blues and Greens"!

I made a art journal page, using a girl from the die cut block and the funny sentiment from the Whimsy quote & letter stickers block from the signature collection art by marlene. I wanted to make a little funny page - and the weird girl and this funny sentiment were perfect for that!


I really love, how the page turned out!

And this is what I did:
 first I put a layer of Gesso on top of a piece of watercolor paper. Then I grabbed acrylic paints from Amsterdam Standard Series in Sky Blue Light and Reflex Green. You can find a huge amount of them in the shop. They come in the 120ml version or in the very handy 20ml size.
First I spreat the blue color with my fingers over the surface, took a Tim Holtz stencil THS092 and a dump baby wipe and took off some of the paint again. Then, when dry I did the same with the green paint.
 When everything was dry, I brayered some acrylic paint in Titanium White randomly over the page to tone the colors down a bit. Then, when the paint was still wet, I took off some of it again with the same stencil.

 Next it was time for more green I thought. This time I used  Phthalo Green and dabbed it with a make up sponge through the stencil #11 from AAL & Create.

 Well, now I wanted more blue and I used one of my favourite stencils at the moment, the Jofy Stencil PM014 from PaperArtsy. I took DecoArt Americana acrylic paint in Ultramarine Blue this time and sponged it through the stencil.

 Time for some stamping. I used the stamp STAMPIN250 out of the Industrial 2.0 line from StudioLight with Archival Ink watering can.....

 .....and from PaperArtsy Minis MN72 with Archival Ink Jet Black.

 I adhered the beach beauty and the sentiment sticker, which I first glazed with Phthalo Green, mixed with Matte Medium......

 shaded the leaves the lady and the sentiment with a black stabilo all pencil, activated with water, added some white splatters and framed the page with distress ink blueprint sketch and doodled around it with a black posca pen.

 Well, I hope you like my fun page like I do!
Here are some close ups:


Now it´s your turn! Join in with our challenge, you have the chance to win a 20 £ voucher to spend in the shop!
Thank you for your visit today and
have a wonderful July!