Gesamtzahl der Seitenaufrufe

Donnerstag, 17. Dezember 2020

Last Minute Christmas Card

 Hello hello!

Welcome to my second post for the "Everything Christmas" challenge over at Country View Challenges!

I am always a last minute person - so, here is my last minute christmas card!


It´s really an easy one.

I used two PaperArtsy stamps - they are Mandala stamps - and stamped and heat embossed 3 Christmas baubles ;o). Then I stamped Merry Christmas with black Archival ink

I glued a diecut twig on top, drew the hangings and the strings. colored the baubles in and made some splatters. I matted the page onto pink cardstock. then I glued everything on a card.

It was very hard to take a good picture, because the embossed baubles are so very glittery!


That´s it from me today!

You can join in with our challenge, make something christmassy and you can win a 20£ voucher for the shop!

I wish you a very Merry Christmas, stay save and healthy!

Dienstag, 1. Dezember 2020

Sophisticated Advent Wreath

 Hello and welcome to my blog, nice to have you here!

Unbelievable - the year is coming to it´s end soon (well, not that I want it to be longer anyway). It´s the first of December already.

Here is the final challenge of this year over at Country View Challenges, and it´s an "Anything goes Christmas".

Last sunday was the first Advent, and I decided to share with you my home made Advent wreath. 

The last years I didn´t have a wreath, I went for some other solutions - a big piece of bark I decorated, a plate, I only draped some greenery and baubles with candles - or even nothing at all (shame).

This year I wanted to make a wreath once again, so I went to the gardening in our village and got myself some greenery, a straw wreath and everything I needed. At the dollar store I got some cheap mini baubles and the candles (which doesn´t look cheap at all!), the turquoise ribbon, the turquoise baubles, which are gorgeous and the silver pinecones. They bueish/greenish stars are also from there.

One tradition I have for many years now is to buy one special bauble for my christmas tree every year. Either I buy it on a advent market or at our stationary store in our village. The owner always has really special and extraordinary christmas decorations. They are a little bit pricy, but they are worth it.

So I went to the stationary store  I bought some special baubles (the silver ones).


Inspired by christmas decoration I saw from Blanche Siegmann, I wanted to make a wreath, which is hanging dowm  little bit. It really looks sophisticated!
So I tied my wreath and added some more greenery to the sides. Then I took a porcellain bowl and put the wreath on top. I placed a cardboard under the wreath, so the candles cand stand save.


To fix the decoration I used wire and hot glue - this is the easiest way.

I went to my christmas box and found some silvery apples, wooden glitter stars and angels hair. The silver greenery I got from the gardening.


I had so much fun to make it and I am really pleased, how it turned out!
Here are some more pictures:


I hope you like my wreath too and feel inspired to create something christmassy too!
If you join in with our challenge, you can win a 20£ voucher to spend in the shop.

So thank you for your visit today and I wish you to have a peaceful Advent time!

Dienstag, 17. November 2020

Altered Wooden Box

 Hello everybody, nice to have you here!

As it is my birthday today, I wanted to show you a little bit more ornate project for my second make for the November challenge over at Country View Challenges with the theme "Anything but a card".

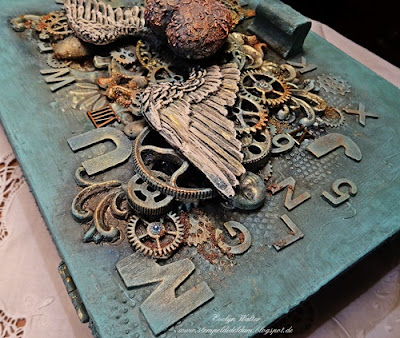
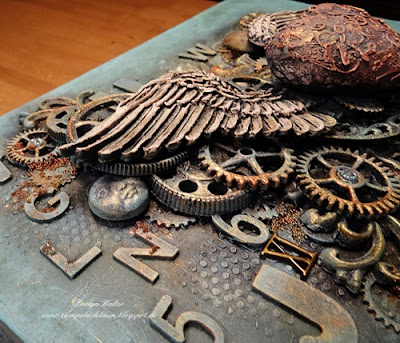
I decided to redesign a wooden box I already altered about 15 years ago. It was a little bit distressed and I didn´t like the look anymore. So I did a complete makeover - and here it is.


I made a process video, so enjoy watching!


Here are some more photos (I admit I am a little bit in love with my box):


Now it´s your turn to make anything but a card for our challenge, you have got plenty of time left! Remember, you can win a 20£ voucher for the shop!

Thank you for your visit today!


Sonntag, 1. November 2020

Different is Good!

 Hello my friends, welcome to my blog and a brandnew challenge over at Country View Challenges!

This month the lovely Jane is hosting the challenge and she wants us to make "Anything but a card".

For my first project I decided to make an art journal page.


I wanted to use my new Tim Holtz stencil and the ricepaper I purchased from Marta Lapkowska.

I started with some washi tapes and the rice paper I tore in pieces and glued down with matte medium. After this I painted the whole surface with a thin layer of white Gesso. Then I took the Deco Arch Layering Stenicil from Tim Holtz and spreat some modeling paste through it - I LOVE how the pattern looks!

To color the pages I used Tattered Angels Glimmer Mists in green, brown, beige and black. On the dry page I painted some gold. I used the DecoArt Extreme Sheen 24k Gold metallic acrylic paint. This is such a gorgeous gold paint! You find it in the shop if you are interested.

While waiting for everything to dry, I drew some mushrooms on watercolor paper and painted them with the the Glimmermists from the background, except the toadstool. For his red head I used red acrylic paint. I fuzzy cut them and glued them on my pages. I outlined the mushrooms with a black stabilo All and activated it with water. Then I set some highlights with a white Posca Pen. At last I glued down some moss to ground the mushrooms.

I only had to glue down the sentiment and surround the pages with a black crayon to frame the pages.

Here are some close ups:


That´s it for today, I hope you´ll find time to play with us at Country View Challenges! As always you can win a 20 £ voucher for the shop!

Thank you for your visit!


Freitag, 23. Oktober 2020

"1 Stencil 12 Ways" Past Creative Team Hop with a Stencil from Shawn Petite

Hello lovelies!

Today I want to share my project for the  "1 stencil - 12 ways" Past Creative Team Hop YouTube Hop!


11 past Creative Team Members and Shawn Petite herself used the same stencil to create something beautiful. We all used the stencil Fall Leaves with masks 8 x 10 stencil. I decided to make an art journal page.


And as it is a YouTube Hop - here is my video!


You will find all the links to the other videos in the description box below the video.

I hope you enjoy the hop!

Thank you for your visit today!


Dienstag, 13. Oktober 2020

Another Halloween Postcard

Hello lovelies, nice to see you back here!

It´s time for my second take on the Halloween scene challenge at Country View Challenges and I made another postcard with a napkin.


I made a process video, so if you like you can watch me making this card.


 Now I hope you will make a nice Halloween scene too, as you know, you can win a 20 £ voucher for the shop.

Thank you for your visit today!

Donnerstag, 1. Oktober 2020

BOOH!

 Hello all, nice to have you here!

For the November Challenge over at Country View Challenges the theme this month is

Halloween!

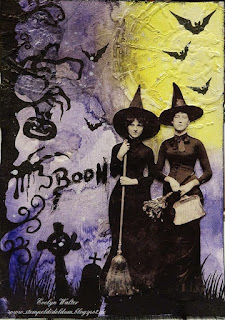
Well, for me it is not an easy theme - I am not a Halloween person. Therefor I made a quite simple postcard.

This is what I did:

I cut a piece of watercolor paper to size and primed it with white Gesso. Then I took a TCW stencil and stenciled kind of spiderweb on the top of the page. After that I took a Halloween napkin, cut out some of the motives and glued them down with matte medium to build a scene.

After drying the surface, I took my watercolors and colored in my postcard. I used light yellow for a moon and a deep purple for the rest of the background. I loved, how the colors bleeded into each other!

Last step was to glue down the pretty witches and to write the word BOOH! with a black Stabilo All pencil. The word was activated with some water.

I hope you like my postcard and feel inspired to join in with our challenge at CVC this month!

As always, you can win a 20£ voucher to spend in the shop!

Thank you for your visit today and happy October!

Donnerstag, 3. September 2020

ART is the only way ....

Hello my friends,

I am back with my second project for the September challenge at Country View Challenges.

The theme is: Complementary Colours.

This time I made another journal page and I chose magenta and green as my colours.


 I have a little sketch pad, on which I try out some things from time to time. I drew a autumn anemone from my garden some days ago and colored them in with watercolors.


I took this painting and photocopied it onto tissue paper. A little hint: adhere the tissue paper with washi tape on a normal copy paper, so your printer can take the tissue paper without any problems!


I glued down the tissue paper with matte medium,....


...added crackle paint randomly to the page and let it dry.


I colored the background with some watercolor (which was not that easy, bacause of the matte medium the color could not stick to the page), colored the anemones with polycromos color pencils from Faber-Castell, matted a finnabair sticker (words you need) onto colored cheesecloth and adhered it to the page. 

Now I only went with black archival ink around the edges - and that´s it!

I hope you like it and feel inspired to join in with our challenge this month! You can win a 20 £ voucher to spend in the shop!

Thank you for your visit today!

Dienstag, 1. September 2020

Believe In Your Dreams

 Hello and welcome to September and the start of Autumn.

This month it is my turn to host the challenge over at Country View Challenges and I want to use you Complementary Colours.

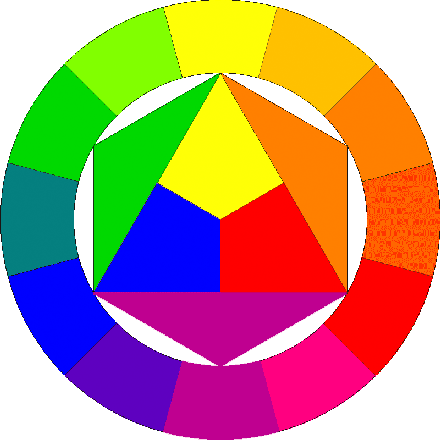
Complementary Colours are the colours on the colour wheel, which are on the opposite.

Farbkreis nach Itten

I made an art journal page and used orange and teal/blue.


I made a process video, so if you want - enjoy watching!


I started by glueing down some washi tapes, one from a Dollar store and the other two from Tim Holtz. Then I added some lace and prepared the surface with clear Gesso.
Now I took a stencil from finnabair and stenciled randomly with black Gesso. When dry I took another stencil, this time one from Tim Holtz, and spread Modeling paste through it and dried it.

Next I watered down blue and green Gouache to my weted background and then the orange Gouache. I also made splatters with blue and orange paint. To dull the colors a little bit, I went over the whole pages with matte wax in white. Then I randomly stamped a very old BoBunny word stamp here and there with black Versafine Clair ink.

I enhanced the structure of the stenciled area with a black brush marker and wiped it with my fingers around. Then I glued down the beautiful butterflies, stamped the Journal words stamp from Rubber Dance to white cardstock and cut out the words. I distressed the edges with black ink before I also glued them down.

Now I only had to make some white dots with a posca pen for more interest and last but not least I thought, the pages would need some black splatters.

I hope you like my journal page as much as I do!
Here are some close ups:


Now I am curious to see, what you will make for our challenge now.

I´ll be back in a few days and hope you will come back here again!

Thank you for your visit today and have a wonderful week!


Mittwoch, 19. August 2020

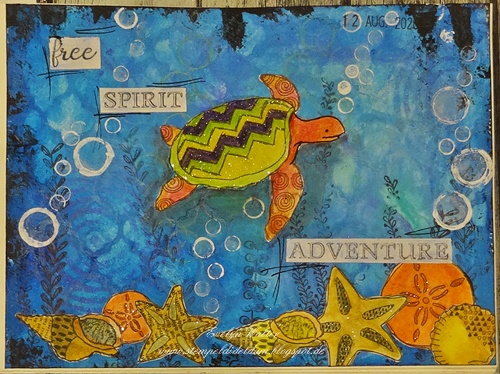
Adventure under the Sea

 Hello and welcome to my second project for the August challenge at Country View Challenges!

The theme this time is "I like to be beside the Seaside". You can make a beach theme or even a underwater scene.

This time I made a Art Journal page with a underwater scene.


For my background I spreat heavy body acrylic paints in different blue and green tones over the background and did some reverse stenciling with a stencil from Tim Holtz.
Then I stamped with a lot of the beautiful stamps from Rubber Dance circles and bubbles from a stamp set in blue and green distress oxides, and waterplants with black Archival Ink from the Doodle Boarders stamp set.
Now I stamped the lovely sea turtle and the shells and seastars on white cardstock and colored them with my Inktense watersoluble pencils and activated them with water. Then I cut them out and glued everything down. The words are also from Rubber Dance, called Journal Words. They are also stamped on white cardstock and cut out. Before I glued them down, I toned the white down with a blue Inktense pencil.
Now I added some bubbles with white paint and the help of several tubes, which came as a protecton for brushes. Then I made some lines around the words with a black posca pen.
Last I went with black paint and a palet knife over the edges to frame the page.

Here are some close ups:


That´s it for today.

Now I hope, you will show some beachy work for our challenge! You can win a 20 £ voucher to spend in the shop!

Thank you for your visit and have a good time!