Gesamtzahl der Seitenaufrufe

Dienstag, 1. Februar 2022

Hearts and Flowers ATCs

 Hello all and welcome to February!

Over at Country View Challenges there is a new challenge as usual at the first of a month. This time the lovely Jane is hosting it and the theme is "Hearts and Flowers".

I made a trio of ATCs.

And this is what I did:

I used some Alcohol Inks on my home made Gelli plate - a first try for me!

I spritzed some colours (I don´t have too much of them) in a kind of a rainbow way onto the surface and placed a bubble wrap on top of it.


I didn´t wnat to waste ink, so I pulled the bubble wrap off and stamped it into one of my art journals. So I have a gorgoues background for a later project!

For even more use up of the ink I spritzed the bubble wrap with some alcohol and pressed it on some white cardstock for another lovely background, I´ll use it for some cards.

After that I placed the bubble wrap back on my gelli plate and left it to dry completely. Then I pulled the wrap off and brayered white paint on top and made a print on white paper. 
Look how gorgeous! I love the result!

I cut three pieces of thick cardstock to ATC size and glued them to the back of my printed paper. Then I cut them out and gatered some stamps and inks The heart stamp is from a visible image stamp set (you can find a lot of visible image stamp sets in the shop here). I stamped it on the ATCs and then I made a mask.

After masking the heart I stamped different flowers from Rubber Dance stamp sets to the background, coloured them and glued some extra flowers on top. Then I stamped some words, either directly onto the ATC or on white cardstock and cut out or on tissue paper before I glued them down. Some tiny hearts here and there completed the ATCs.


Here they are, one by one:


For one of the ATCs I stamped and coloured and extra heart and glued it down with foam squares.


I hope you like my little Heart-TCs ;-) and feel inspired to make something for our February challenge! You can win a 20 £ voucher for the shop!

Thank you for your visit today, I´ll be back in a few days with my second project.

Happy February!

Mittwoch, 5. Januar 2022

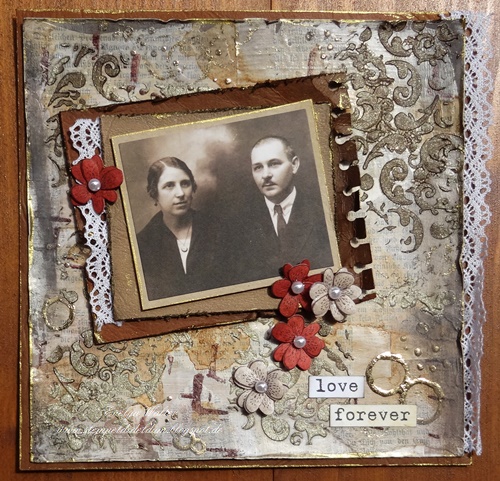
Love Forever - Art Journal Page

Hello, hello!

For my second project for the Sparkle and Shine Challenge over at Country View Challenges I decided to make another art journal page, but this time for my square journal (15cm x 15cm). I already have some pages made and after another 4 or 5 pages I will bind all pages together - a little goal for 2022.


For my page I used watercolour paper as base for all my mixed media layers. And this is what I did:


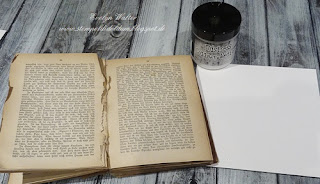
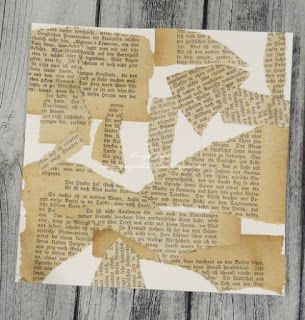
I cut my watercolour paper to size and used scraps from the pages of an old book. I adhered it with collage medium (you can find it in the shop here).
this is what I got.


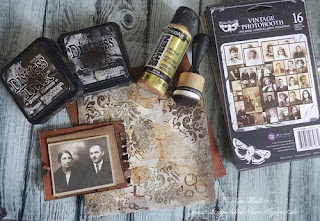
To tone it down a bit, I painted the page with white Gesso (you can buy a lot of finnabair products in the shop here)

For the background colour I used tea this time! I only dabbed the teabag several times over the page and dried it with my heat tool. I repeated the process until I was happy with the result. To seal it, I carefully went over it with collage medium.


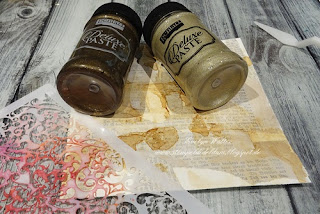
Now it was timer for some texture. I used a Memory Box stencil and spreat glittery DeLuxe Paste in two different colours randomly over the page.


When the paste was dry, I did some gilding with glue and gold foil. For more golden accents I used decoArt Extreme Sheen acrylic paint 24k gold for the edges of all paper layers - only delicate, but still visible.
I also distressed the edges with DI ground espresso and black soot.
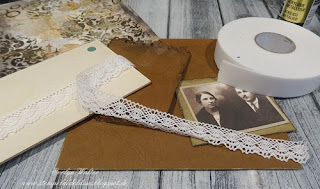
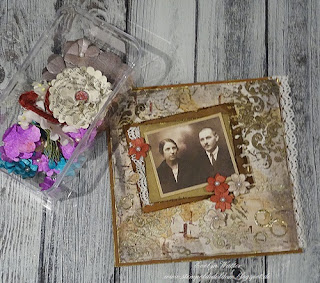
My focal point is a sticker from finnabair´s photobooth. I layered it on different colored cardstock. The biggest one I punched at one edge with a EK punch from my stash.

I put everything together with double sided foam tape. For more vintage style I used some lace from my stash.
Last I grabed my home made flowers, the tiny ones with a shimmery pearl in the center, and added them to the page.


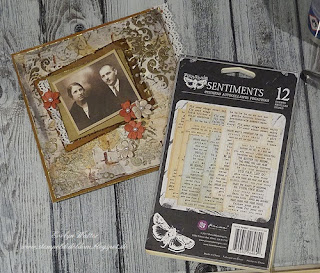
The final step was to glue down some word, again stickers from finnabair.
Here are some close ups:


I hope I could inspire you to join in with our challenge, it´s easy to add shine and shimmer to your work! Don´t forget to read the rules - you can win a 20 £ voucher for the shop!

Thank you for your visit today!


Samstag, 1. Januar 2022

Happy New Year - Let It Sparkle and Shine!

 Happy New Year everyone!

2022 - wow, where time has gone!

The first challenge of the year at Country View Challenges, which is called "A Year to Sparkle and Shine", is hosted by my teamy Jo. She says:

 We would like to see LOTS of sparkle and shine on your projects, no "token" gems or sequins please; you really need to sprinkle that sparkle! This means that you can use lots of different sparkly and shiny products (like metallics, sparkly embossing powders, glitters, lustres, foil, glazes, mirror cardstock, mica sprays or paints etc) as part of your designs.

I look forward to seeing what you make and you never know, you might even win a £20 voucher for the shop! Before you enter your project though, please read the Rules!

I made an art journal page with a lot of glitter and shine.


And this is what I did:

I started by lightly coloring my pages with very watery pearl watercolors in blue-green and silver. I spreat it over the pages with a paintbrush. After it was dry, I added some splatters in the same colours.

Look at that gorgeous shimmer!


Next I did some randomly stamping with a stamp from Art by Marlene (you can find a lot of Art by Marlene here in the shop!) with VersaFine Clair Morning Mist.


Next I stamped the little stars from the Rubber Dance Merry Magpie stamp set with a glue stamp pad onto my pages and sprinkled silver fine glitter on them. It´s beautifully glittery!


Now I took a double sided adhesive foil in black, drew a moon shape and cut it out.

I pulled off the foil on one side and sprinkled different glitter, from super fine to gritty in silver and black onto the moon.

And look! Wow! Such a gorgeous twinkling moon!

I adhered the moon to my page, put a paper doll on it and drew a fishing rod. On it´s string is hanging a quote from Eleanor Roosewelt, a stamp from PaperArtsy.
Then I only did some shading and some doodling with a white Posca Pen, stamped here and there lightly the word dream and - that´s it!

Here are some close ups:


I hope you like my page and feel inspired to join in our challenge!
Happy New Year again and thank you for your visit!


Freitag, 17. Dezember 2021

DIY Christmas Bauble

 Hello all!

Wow, only 7 days to Christmas, can you believe?

My second project for Country View Challenges - Anything Christmas is a Christmas Bauble.


This is an easy fold and glued Honeycomb ball made of - you won´t believe it - coffee filter bags!

Well, I´ll show you how I made it:
(I found this at pinterest here: Honeycomb ball)
You need:
8 coffee filter bags, a mask, scissors, pencil, double sided tape or a glue stick, if you have at hand a bone folder, a string, if you want watercolour ( I used a metallic one, the shimmer is amazing!), some pearls and beads if you like.


Fold your filter bags in half and crease the edge with the bone folder.
like so.
Next use your mask and draw half circles onto the folded bags.
Cut them out.

This step is optional. I painted all my circles (16) with metallic water colour. But you can use them also as they are (either the white ones like here or the brown ones).


When they are dry, fold them at half again and mark the middle of the halfcircles...
like so.

Now you can start glue all together. I used double sided tape, but a glue stick does work too.
First glue all circles in the middle.
Now you have to put tape to the sides and glue one half circle on top of the other.
I decided, that I wanted some gold at the edges and I painted them with extreme sheen paint.

Last I made some decoration with pearls and glued the gold string to the middle of my bauble.

Now I only had to close the bauble - and done!

I really love, how it turned out!
May be you´ll give this a try, it´s super easy and looks really elegant!


May be you´ll find some time to join in with our challenge, there is enough time! You can win a 20 £ voucher for the shop - no! This month there are even two!

Now I want to wish you a very Merry Christmas and a wonderful holidays!

Thank you for your visit!